| View previous topic :: View next topic |
| Author |
Message |
Al Hasse
Member

Joined: 19 Nov 2005
Posts: 4379
Location: Bremerton, WA
1992 Chevrolet Camaro RS
|
|
| Back to top |
|
 |
Quasi-Traction
"I have petals"

Joined: 24 Oct 2005
Posts: 3873
Location: stumptown
1986 Chevrolet Camaro Berlinetta
|
 Posted: Sat Apr 09, 2011 11:15 am Post subject: Posted: Sat Apr 09, 2011 11:15 am Post subject: |
 |
|
That's pretty sweet.
_________________
 |
|
| Back to top |
|
|
Al Hasse
Member
Joined: 19 Nov 2005
Posts: 4379
Location: Bremerton, WA
1992 Chevrolet Camaro RS
|
| Posted: Sat Apr 09, 2011 12:35 pm Post subject: |
|
|
Some more progress today. I pulled the steering box to get to the intermediate shaft and rag joint, only to find the rag joint "looks" OK, but the rubber boot over the universal joint at the firewall is shredded. I couldn't find a way to remove the boot or u-joint, so a new shaft I think is the way to go. I found a used one on e-Bay for $60 shipped and his pictures of both ends looked really good. In the mean time, I cleaned and painted the steering box, so it looks near new. The pump and box both need new O-rings on the pressure fittings, they leak now with no pressure behind them.

Last edited by Al Hasse on Sat Apr 09, 2011 3:15 pm; edited 1 time in total |
|
| Back to top |
|
|
Leejo2005
Member

Joined: 12 Jul 2009
Posts: 466
Location: Kennewick
|
| Posted: Sat Apr 09, 2011 1:11 pm Post subject: |
|
|
I see you've got a wonder bar on there too. I put one on and changed my steering box only to find the frame cracked. I had to take it to get welded. Seems to have tightened up the steering response quite a bit. My box still feels sloppy though as I only installed a rebuilt box.
_________________
2010 Cobalt LT
1999 Taurus SHO
1974 F-250 460
1967 Satellite Sport 383 |
|
| Back to top |
|
|
aaron_sK
Member
Joined: 23 Jan 2006
Posts: 8834
Location: Back in beautiful Tacompton
1987 Chevrolet Camaro IROC-Z
|
| Posted: Sat Apr 09, 2011 3:04 pm Post subject: |
|
|
| Al I have a Camaro intermediate shaft here. |
|
| Back to top |
|
|
Al Hasse
Member
Joined: 19 Nov 2005
Posts: 4379
Location: Bremerton, WA
1992 Chevrolet Camaro RS
|
| Posted: Sat Apr 09, 2011 3:11 pm Post subject: |
|
|
| Too late, thanks Aaron. I bought the one on e-Bay as the price was decent, and assuming the pictures were of the actual piece, it's a nice one. |
|
| Back to top |
|
|
aaron_sK
Member
Joined: 23 Jan 2006
Posts: 8834
Location: Back in beautiful Tacompton
1987 Chevrolet Camaro IROC-Z
|
| Posted: Sat Apr 09, 2011 3:19 pm Post subject: |
|
|
All good, Al. I'll throw it in the pile with the rest of the parts.  |
|
| Back to top |
|
|
Al Hasse
Member
Joined: 19 Nov 2005
Posts: 4379
Location: Bremerton, WA
1992 Chevrolet Camaro RS
|
| Posted: Wed Apr 13, 2011 2:34 pm Post subject: |
|
|
I received a phone message today. My motor is finished and we set up a delivery date for Monday  I guess it's time to get a new clutch so I can mate the motor to the tranny before I get too much surface rust on the flywheel, the clutch I have isn't going on anything I guess it's time to get a new clutch so I can mate the motor to the tranny before I get too much surface rust on the flywheel, the clutch I have isn't going on anything |
|
| Back to top |
|
|
RSFreak
The other "John"

Joined: 23 Jan 2004
Posts: 2946
Location: Renton
1989 Chevrolet Camaro RS
|
| Posted: Thu Apr 14, 2011 2:43 pm Post subject: |
|
|
| aaron_sK wrote: | | RSFreak wrote: | | Yet another picture of the Mountain Man with an engine coming out of a 3rdgen! |
Whether you want your broke-d**k Chevy towed, or your piece of crap 305 removed, I'm the guy to do it. 
|
I want you to remember that you said this! 
_________________
'86 Trans Am - 5.0L TPI - LT1 cam - 700R4 - WS6
'85 Camaro Berlinetta - IROC clone
 |
|
| Back to top |
|
|
Al Hasse
Member
Joined: 19 Nov 2005
Posts: 4379
Location: Bremerton, WA
1992 Chevrolet Camaro RS
|
| Posted: Sun Apr 17, 2011 12:17 pm Post subject: |
|
|
More progress. I received the new (for me) steering intermediate shaft on Friday and installed today, I had to "persuade" it onto the steering column as it seemed a little narrow where the bolt tightens up on it. New O-rings on the power steering lines and connected to the box, connection to the pump when the motor goes in.
I ordered a new clutch on Friday and picked it up this morning, didn't come with throw out bearing or pilot bushing, so I bought a new throw out bearing and, because the store didn't have bushings, I bought a pilot bearing. New exhaust header gaskets and bolts were also picked up on Friday. I'm finding out again that it's all the little things that add up and really put the dent in the pocket book 
Here's the new intermediate shaft installed between the column and the box...
 |
|
| Back to top |
|
|
Schultzy89GTA
M.R.A. (11sec Club)

Joined: 08 Jan 2004
Posts: 4415
Location: Gresham, OR
1989 Pontiac GTA
|
| Posted: Sun Apr 17, 2011 1:23 pm Post subject: |
|
|
Glad to see she is coming together Al.
| Al Hasse wrote: | I'm finding out again that it's all the little things that add up and really put the dent in the pocket book
|
Ain't that the truth!
-Schultzy |
|
| Back to top |
|
|
Al Hasse
Member
Joined: 19 Nov 2005
Posts: 4379
Location: Bremerton, WA
1992 Chevrolet Camaro RS
|
| Posted: Sat Apr 23, 2011 11:26 am Post subject: |
|
|
Little more progress. After getting my 153 tooth flywheel balance for this motor, I was able to attach the clutch and pressure plate assembly.
This is the motor as it was delivered, TB wasn't attached and was delivered as an accessory to the motor (as expected), still need the bolts to attach it to the intake.

Clutch and pressure pate attached. The headers in this pic are only attached to check fitment with other components and interference with wires and lines.

I also found out that the Vortec intake uses slightly different brackets for throttle cable and other things, I may have to hunt those down or see if mine can be modified |
|
| Back to top |
|
|
KatsCam
Member

Joined: 31 May 2010
Posts: 93
Location: Driving a bitchin' Camaro
1991 Chevrolet Camaro RS
|
| Posted: Sun Apr 24, 2011 10:31 am Post subject: |
|
|
| Did you get a bunch done yesterday with the sunny weather? |
|
| Back to top |
|
|
Al Hasse
Member
Joined: 19 Nov 2005
Posts: 4379
Location: Bremerton, WA
1992 Chevrolet Camaro RS
|
| Posted: Sun Apr 24, 2011 12:17 pm Post subject: |
|
|
Some I have the tranny attached, needs to be torqued to the block as soon as I find the torque specs - same goes for the tranny to bell housing. I found that I need some pipe adapters for some senders - CTS mainly. Also, there is a square drive plug in the passenger side head that I need to remove to install my fan switch, but the darn thing isn't 1/4" or 3/8", but somewhere in between  Waiting for a few thing ordered here and there, but I could probably drop it in the bay as is and continue working. Waiting for a few thing ordered here and there, but I could probably drop it in the bay as is and continue working. |
|
| Back to top |
|
|
chevymad
Master B
Joined: 11 Jan 2004
Posts: 5474
1987 Pontiac Formula
|
| Posted: Sun Apr 24, 2011 12:20 pm Post subject: |
|
|
| Thats a 5/16 square pipe plug socket. You'll have alot of fun trying to get that out. Socket can probably only be found at real tool houses. If you have anywhere else you can screw that sender in you'd be better off. |
|
| Back to top |
|
|
Al Hasse
Member
Joined: 19 Nov 2005
Posts: 4379
Location: Bremerton, WA
1992 Chevrolet Camaro RS
|
| Posted: Sun Apr 24, 2011 1:32 pm Post subject: |
|
|
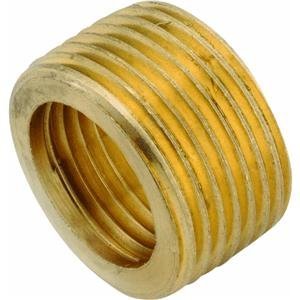
I think I found a spot. There are two, one needs a 1/2" to 3/8" adapter, on top where the CTS should go. How would an adapter affect the reading by the ECM with the probe sitting higher? The other looks ideal for the fan switch, except for it being almost blocked off at its base, just a small hole open to coolant. The fan switch probe fits through that opening just fine, if I mount the CTS there, its probe doesn't quite reach the opening, but would still be surrounded by coolant.
This is the port just below the t-stat housing, and shows how the hole is almost blocked off.
 |
|
| Back to top |
|
|
chevymad
Master B
Joined: 11 Jan 2004
Posts: 5474
1987 Pontiac Formula
|
| Posted: Sun Apr 24, 2011 9:24 pm Post subject: |
|
|
It's best to get the probe into moving water if possible. It will work without because water conducts heat so well but probably be slightly off. I'd look close and see if that hole can be safely opened up at all.
I'd still try it before I spent too much time on the head plug. Those usually seize in there so tight. |
|
| Back to top |
|
|
Al Hasse
Member
Joined: 19 Nov 2005
Posts: 4379
Location: Bremerton, WA
1992 Chevrolet Camaro RS
|
| Posted: Sun Apr 24, 2011 9:26 pm Post subject: |
|
|
I found and ordered the reducer I was looking for, couldn't find one locally. A face bushing without the hex on top, just a donut with threads inside and out on a tapered diameter. The CTS will go on top by the t-stat housing and the fan switch will go in front horizontally.
The probe on the fan switch fits through that hole fairly well. The face bushing on the CTS will keep the probe lower than an hex reducer will.
| chevymad wrote: | | I'd look close and see if that hole can be safely opened up at all. |
If need be, it can be bored out. The back side is easily visible through the t-stat hole. A hose attached to a shop-vac through the t-stat and a drill on the front side. Since the fan switch probe sticks through the hole, I see no reason to drill the hole bigger. |
|
| Back to top |
|
|
Al Hasse
Member
Joined: 19 Nov 2005
Posts: 4379
Location: Bremerton, WA
1992 Chevrolet Camaro RS
|
| Posted: Sat Apr 30, 2011 2:25 pm Post subject: |
|
|
Not alot of progress this week, although I could probably drop the motor in the car now, some of the things left are easier with the motor out. I decided to keep the EGR and need to plumb a pipe to one the driver side header primaries, I'm waiting for the GM fitting for that.
I put all the accessories on to see how everything fits together, and how harness and tubing might need to be rerouted. The biggest change is the EGR position on the front instead of the back of the motor, and the new EGR tube running along the driver side valve cover.
I also noticed my new TBI has a different TPS than the stock one did, as well as a different connector. This one is adjustable as the old one was not. Time to scour the yards for a connector.
Here's a look at the motor with all accessories attached, they'll come off for clearance prior to install.

Another look at the driver side. The EGR tube will connect to a pipe welded to the #7 primary via a GM fitting still on its way.

And a look at the passenger side, and all the A.I.R. equipment, didn't really see a reason to remove it.
 |
|
| Back to top |
|
|
Al Hasse
Member
Joined: 19 Nov 2005
Posts: 4379
Location: Bremerton, WA
1992 Chevrolet Camaro RS
|
| Posted: Sun May 01, 2011 6:15 pm Post subject: |
|
|
A couple of more little things today while still waiting on a fitting or two. I got gaskets and installed the water pump. Since I'm keeping the EGR, I got the gasket and mounted that. A.I.R tubes routed and and fitted to the headers, I'll temporarily remove them for engine install. I mounted the EGR solenoid with it's original bracket just off from the passenger valve cover and just behind the EGR, it has a tab on it which I can secure the harness and connector. For the EGR vacuum tubing, I recycled the tubing from my heater diverter valve, used some heat to bend it the way I wanted and made it look almost factory.
 |
|
| Back to top |
|
|
|